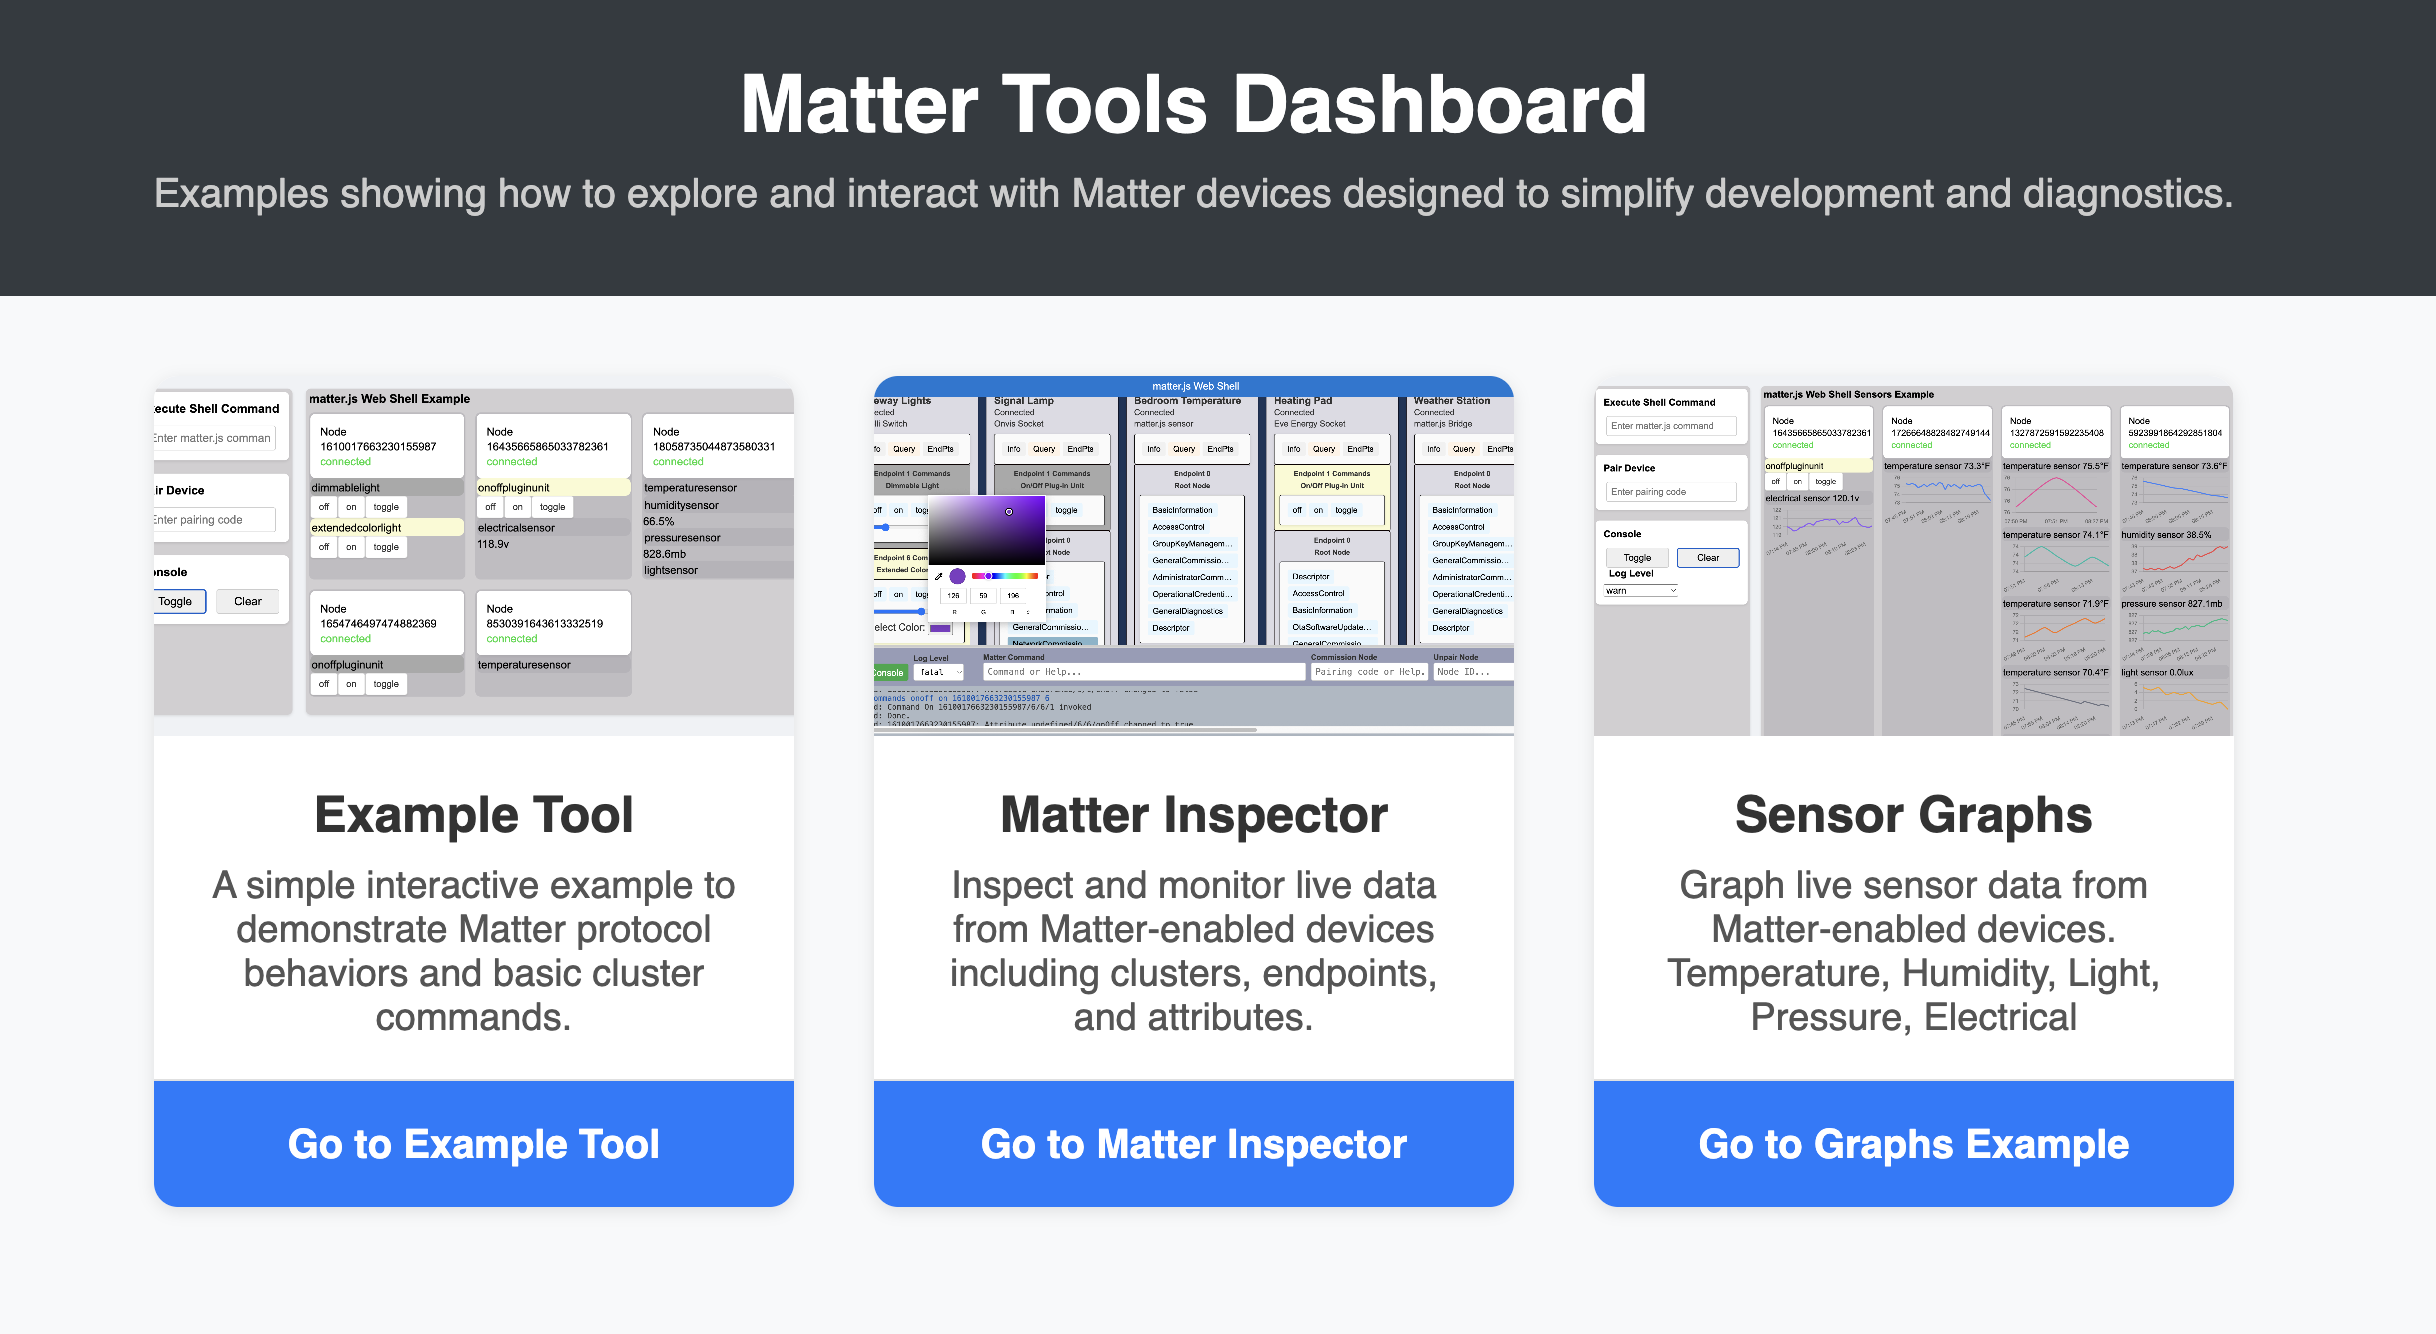
This repository contains examples of Matter Controllers that utilize a web socket to communicate with the Matter Shell from the matter.js project. All the functionality of the standard matter shell is available, including commissioning devices, controlling devices, querying device status and capabilities, accepting asynchronous device changes, etc. The basic strategy is to send standard matter shell commands over a websocket to the matter.js shell, and then capture the results to create or update the user interface in a browser. For details of the matter.js shell capabilities, see the Matter Shell project
- git clone https://github.com/JimBuzbee/matter-controller.git
- cd matter-controller/
- npm i
- npm run webshell
- Visit http://localhost:3000/ in your browser
Once the webshell server is running, the easiest way to get started with a Matter device, is to use one that has already been commissioned via Google/Apple/Home Assistant/etc. In the appropriate controller, locate the menu for sharing or linking the device with another app. When given a pairing code, enter it in the webshell form. Once entered, after a short delay a visualization should pop up in the browser user interface. If it doesn't, check the console for messages.
If you want to commission a Matter device that hasn't already been set up, see the matter.js shell documentation regarding Bluetooth libraries for your system, start the webshell with a "--ble" parameter, and then when entering the pairing code in the browser UI, add --ble, e.g. "0123456789 --ble"
 This example creates a "tile" for each previously or newly commissioned Matter node. The tile shows the node ID, description, status, commands (for some devices), and the standard components of a Matter device: endpoints, clusters, and attributes. The name and description of each tile can be persistently changed by clicking and entering the desired value. To show the current state of cluster attributes, click the cluster name in an endpoint display. As attributes are changed asynchronously, such as when sensors report new values or when a controller commands a light, the updated attribute value will be temporarily displayed underneath its associated cluster.
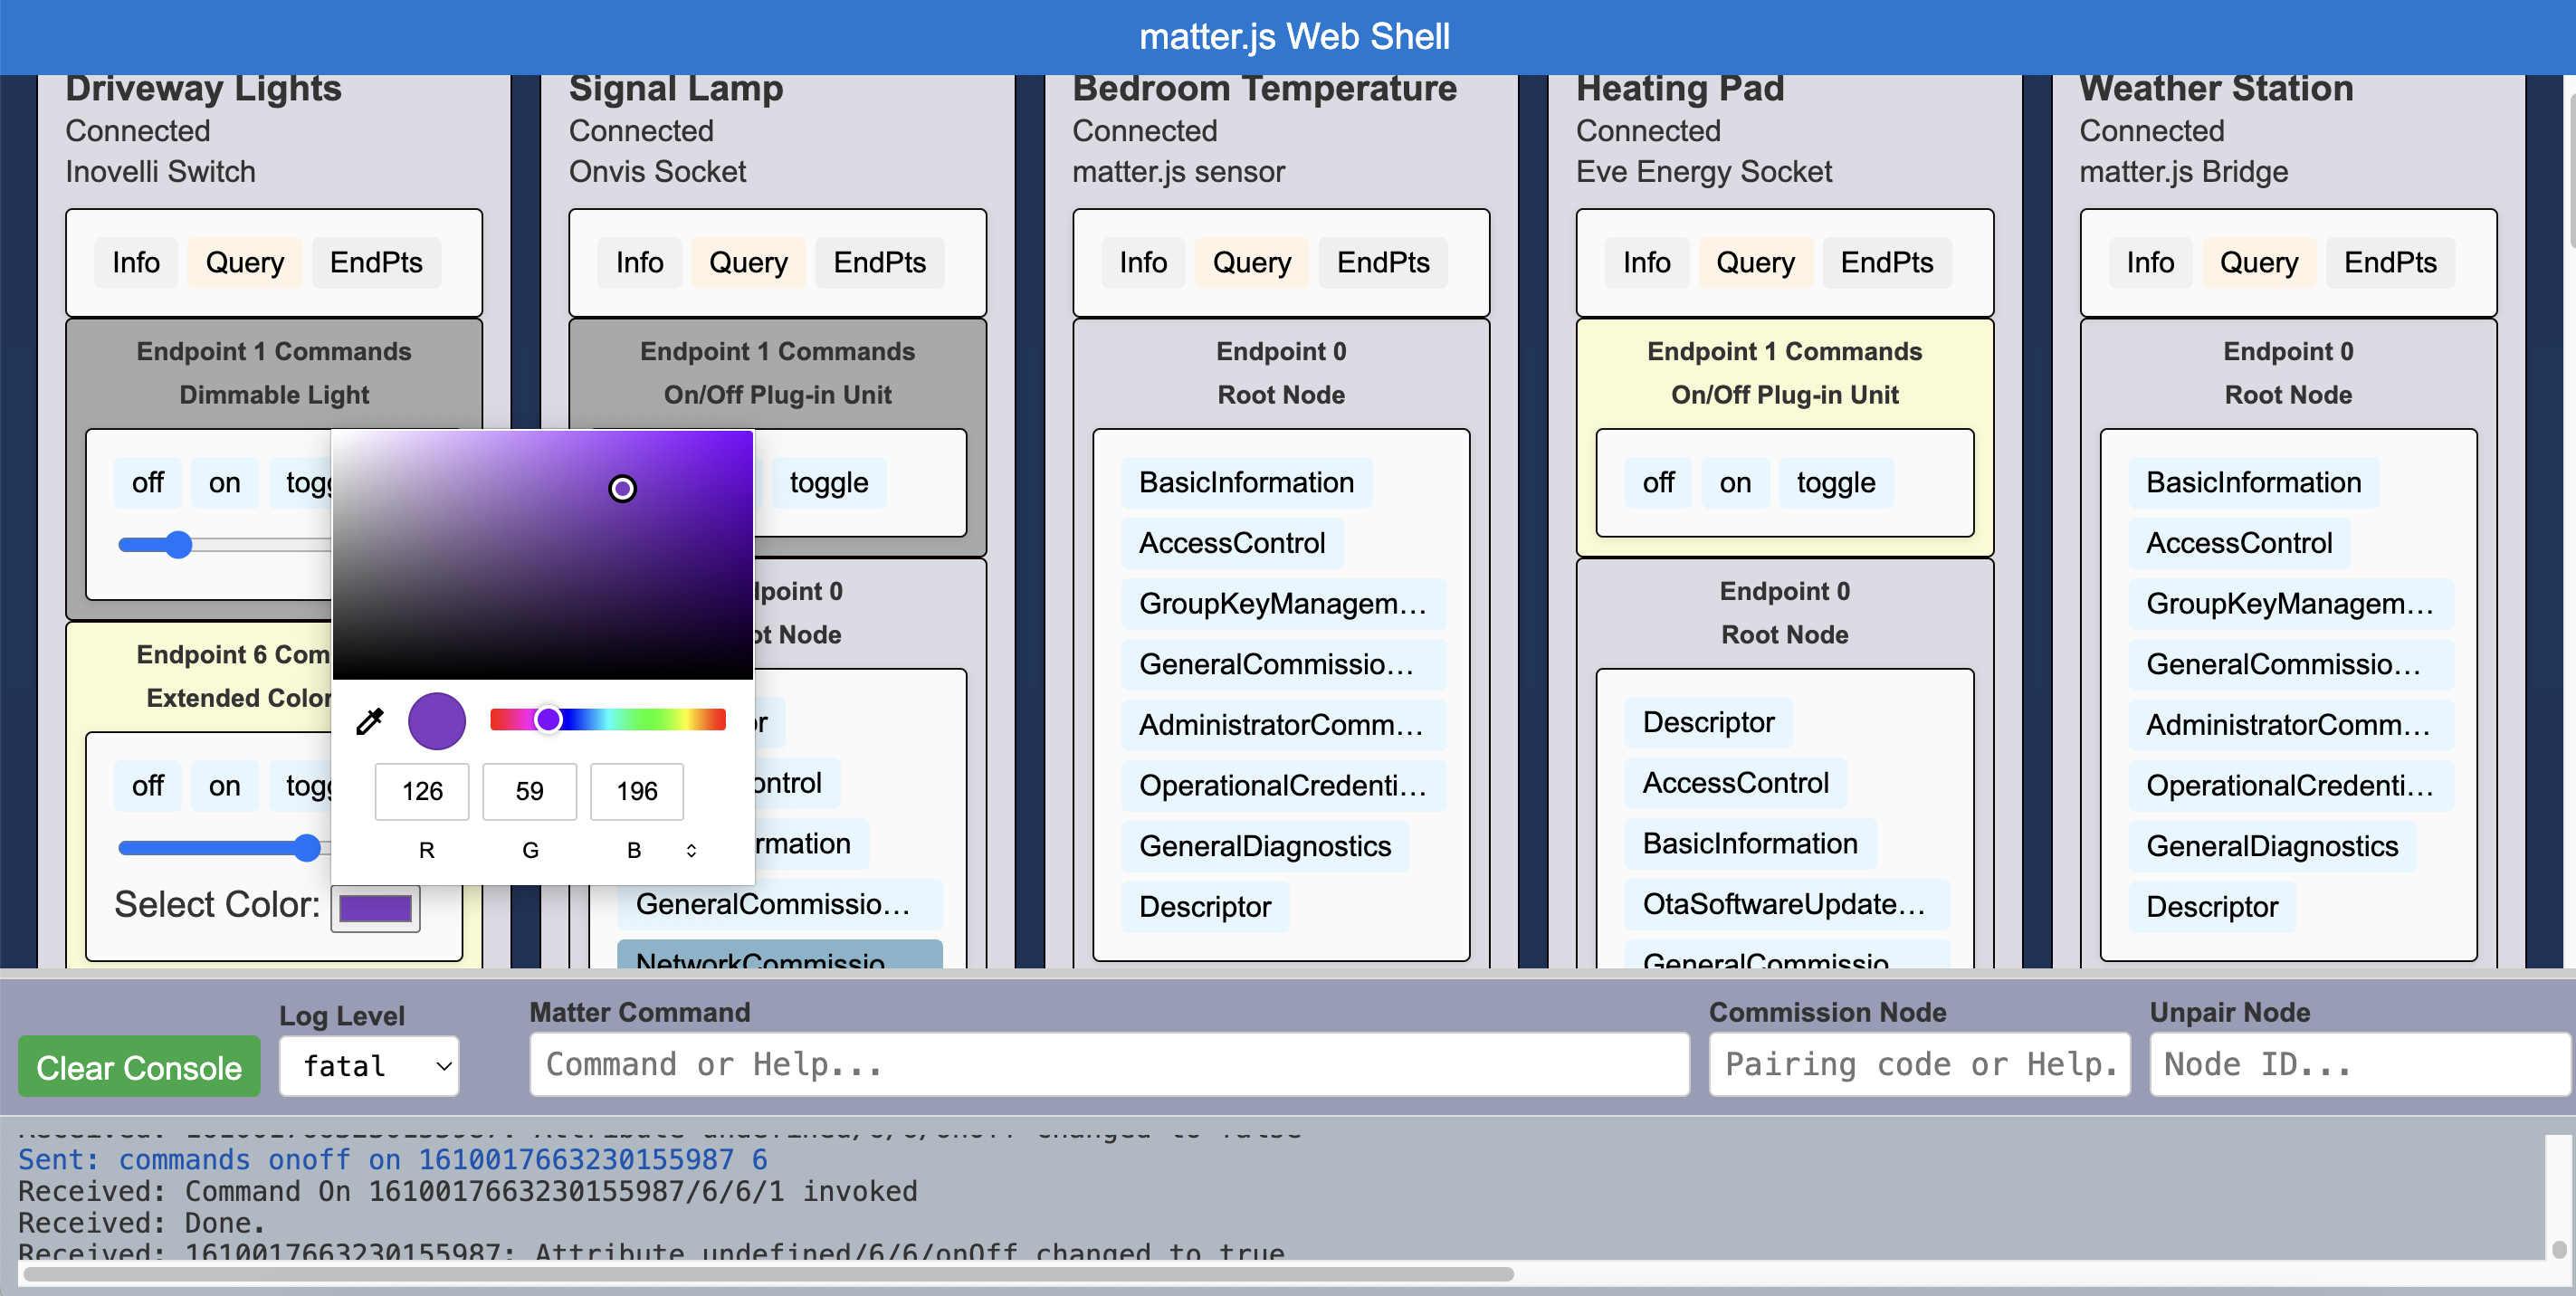
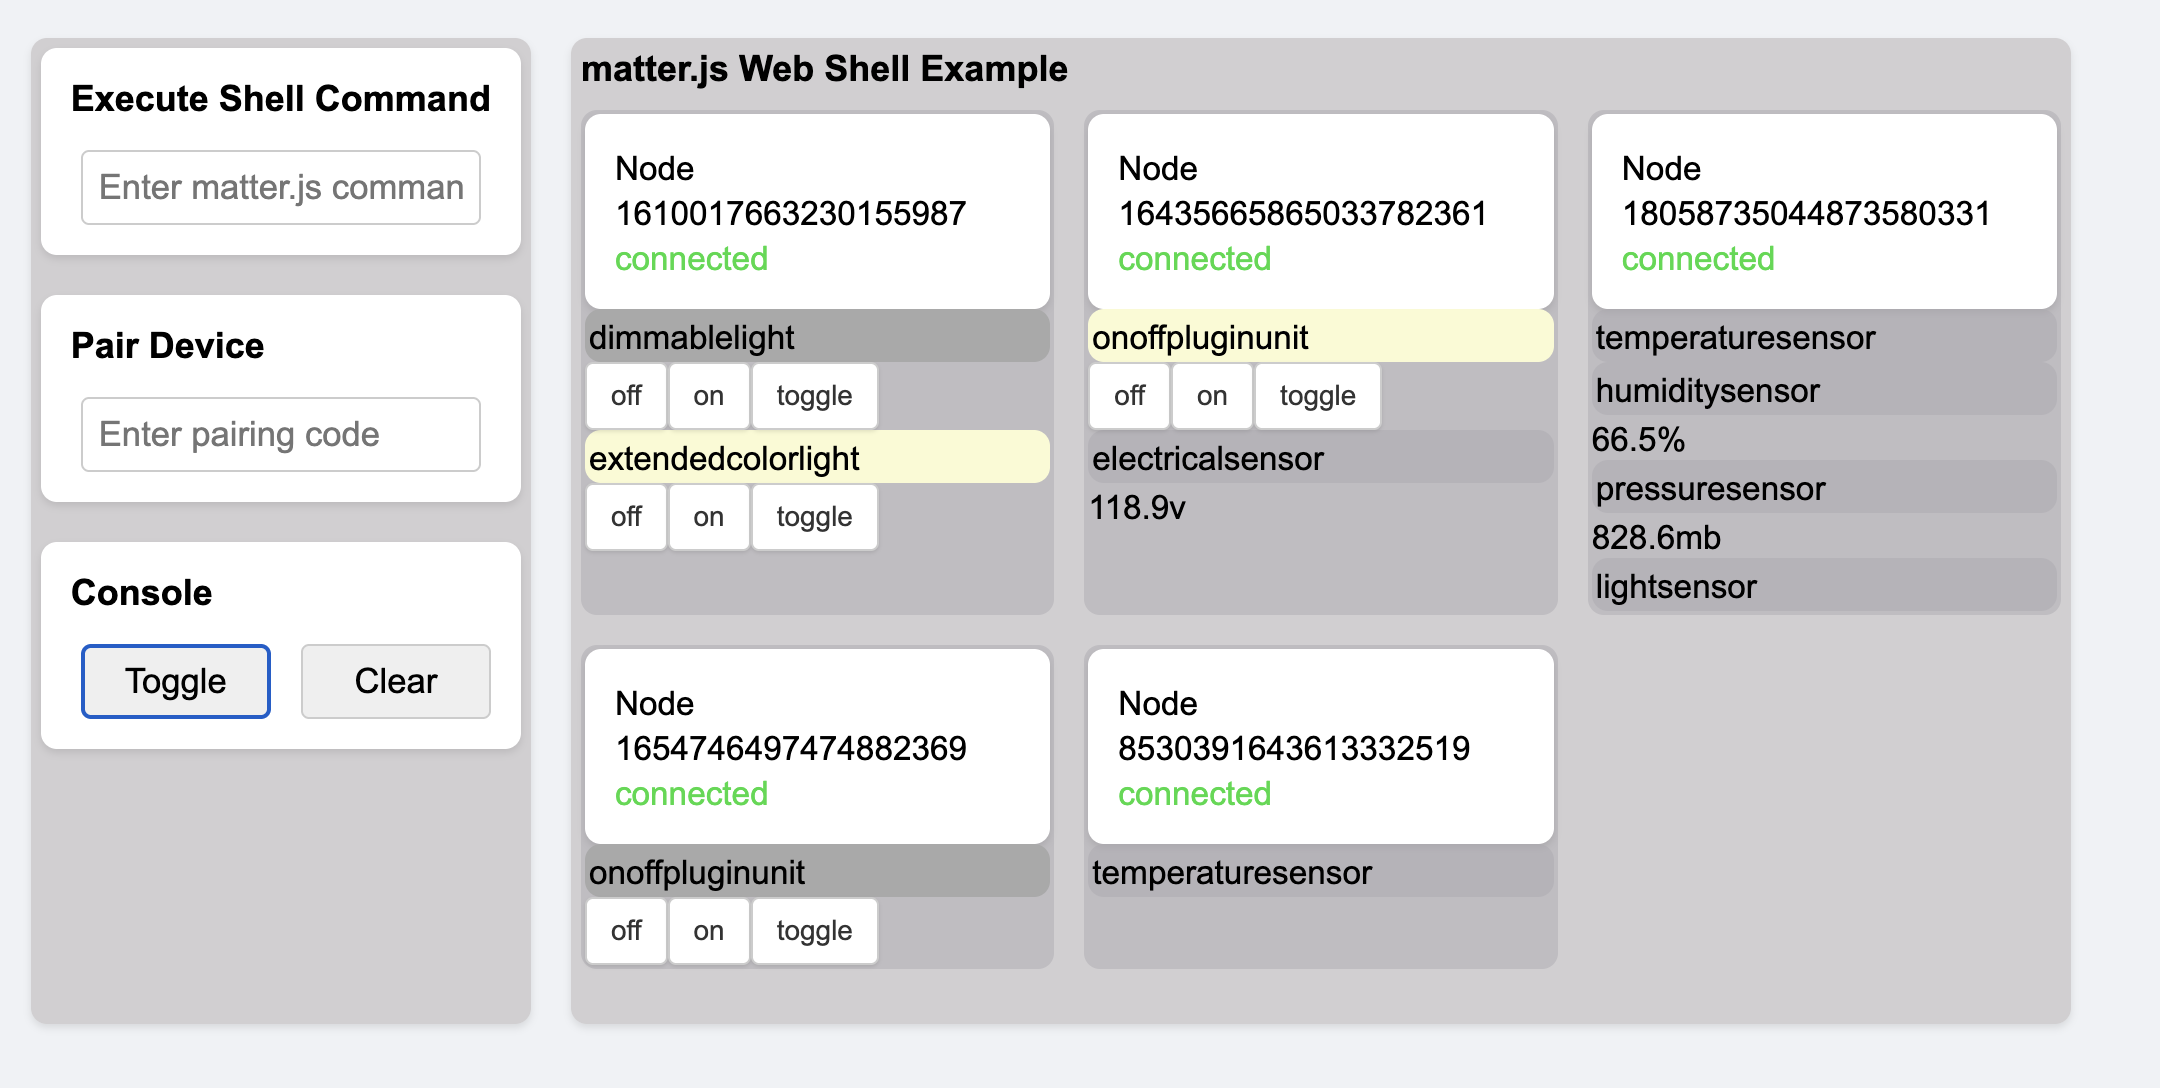
This is a minimal, single-file, standalone example showing interaction with Matter devices. It is similar to MatterInspector, but with fewer options and interactions. It adds sensor value conversion, formatting and display.
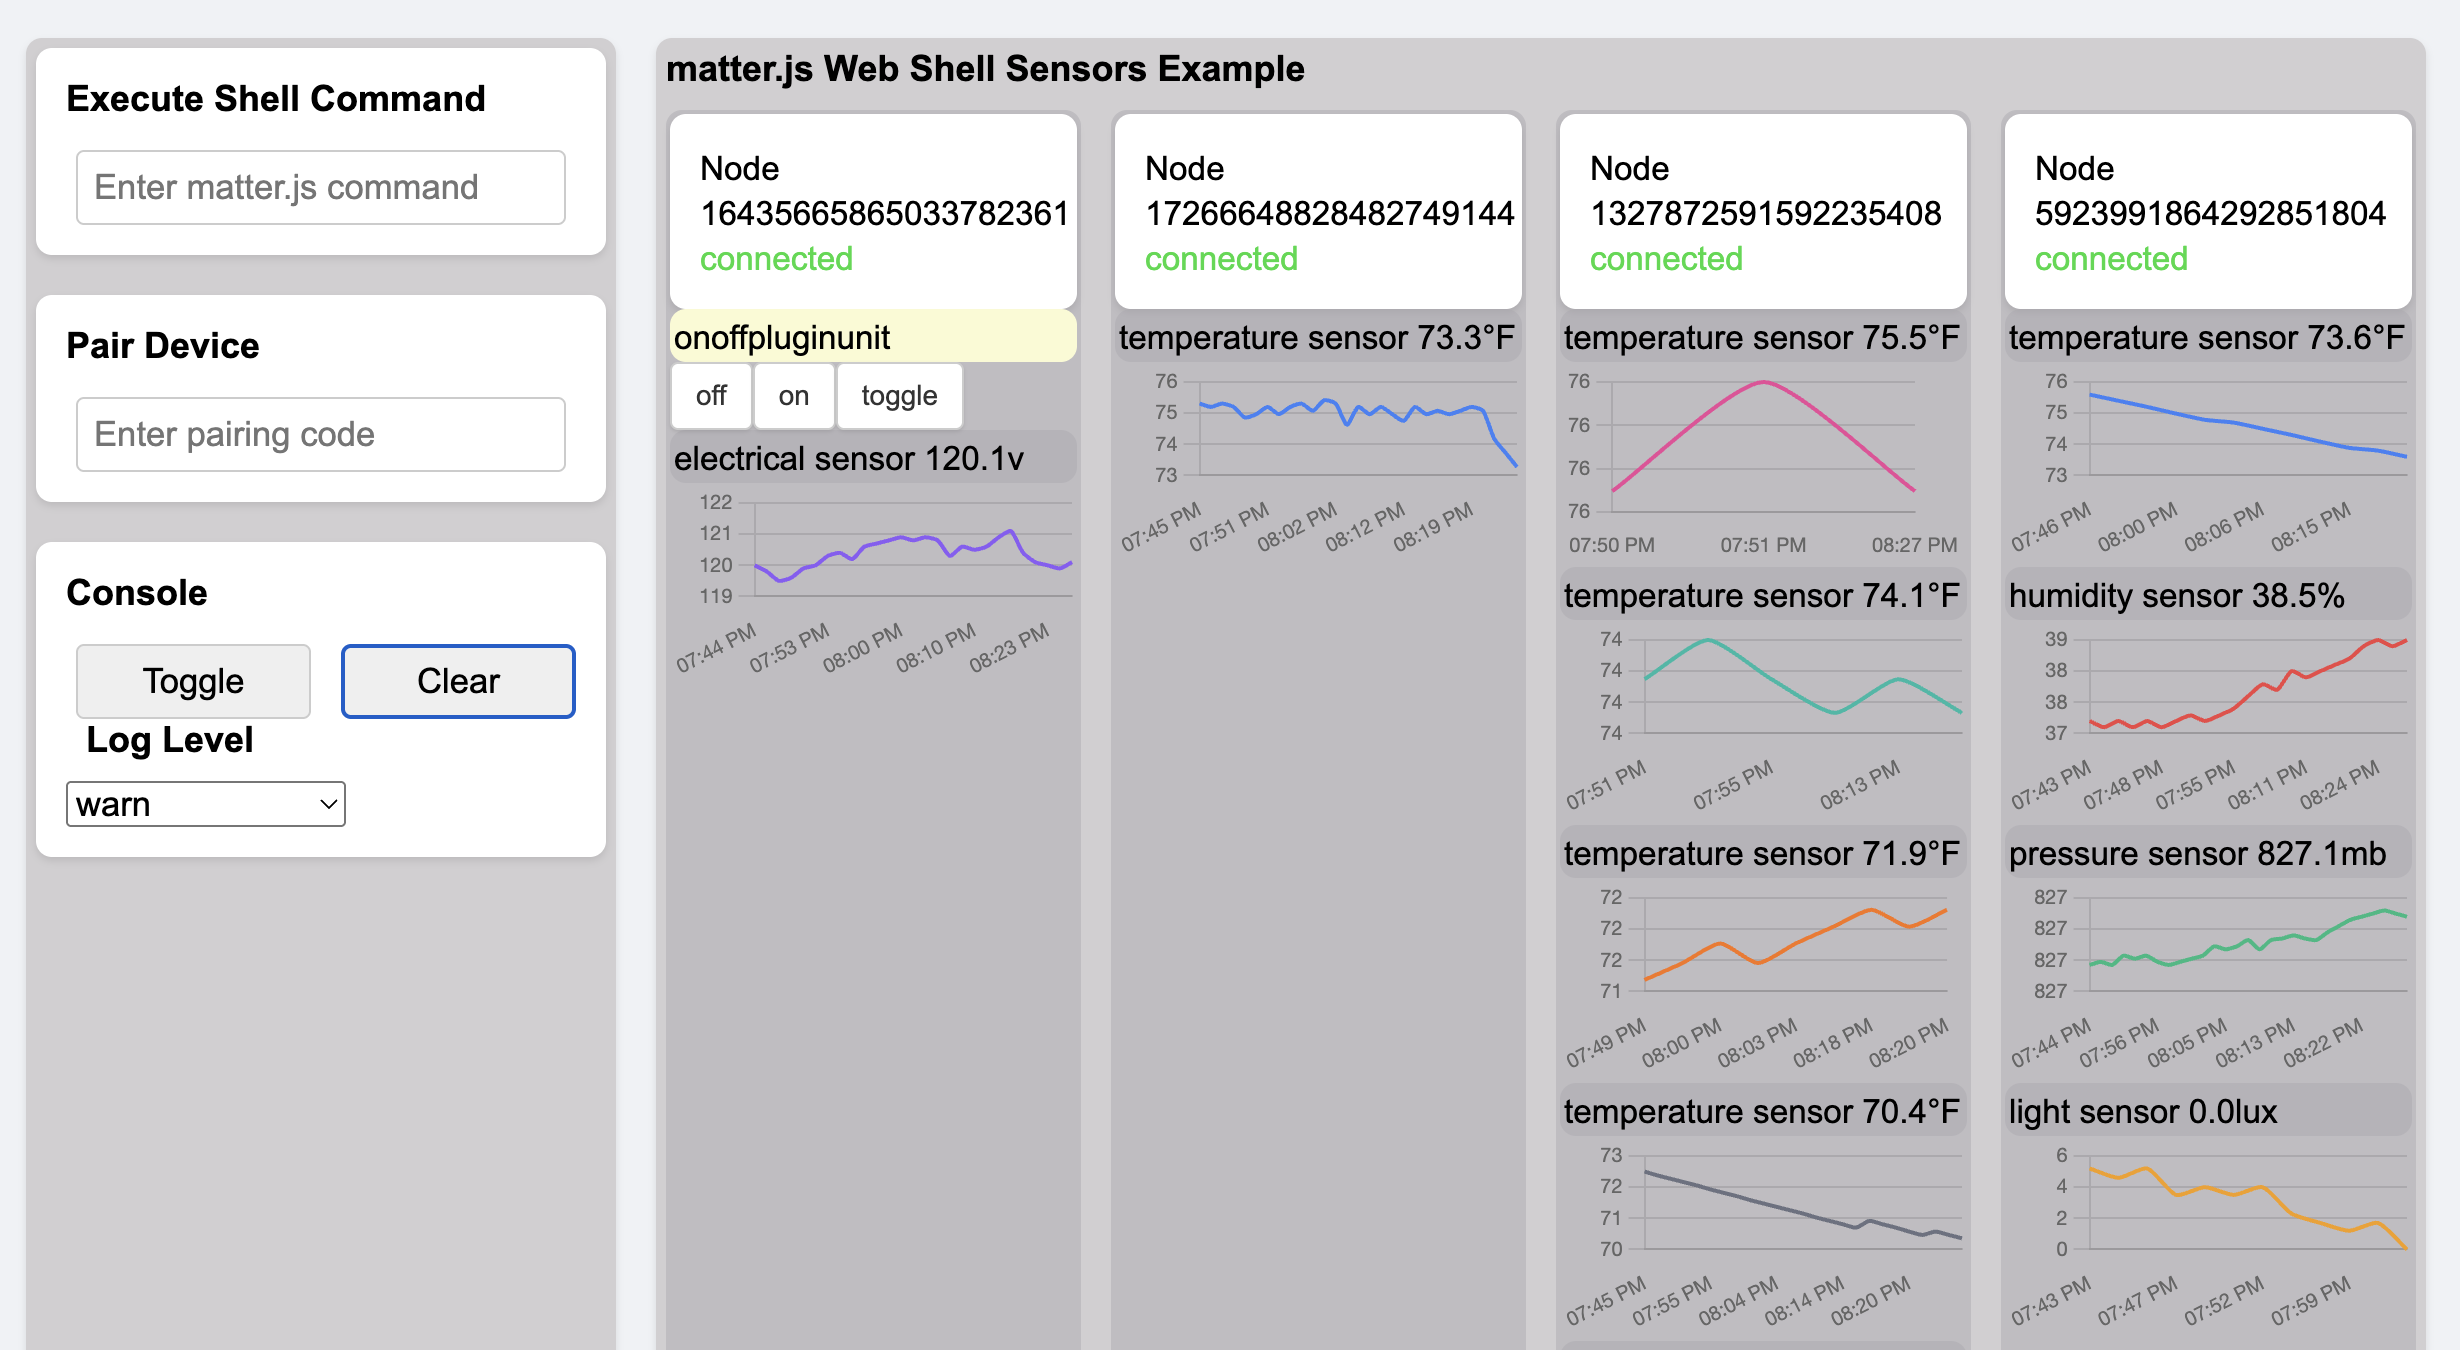
This is a minimal example showing how to generate graphs based off of Matter sensors. This example shows Temperature, Humidity, Air pressure, Light and Electrical sensors. Data is not persisted across reloads. For production, server-side storage would be used.
The last two examples are single-file standalone examples. In contrast, MatterInspector uses the small library, controller-library.js that simplifies interactions with the Matter Web Shell. The user of the library is responsible for the lifecycle of the websocket as far as creation, opening, closing, errors and message reception. For example:
const  protocol = window.location.protocol === 'https:' ? 'wss:' : 'ws:';
const  host = window.location.hostname || 'localhost';
const  defaultPort = window.location.port || 80;
const  wsUrl = `${protocol}//${host}:${defaultPort}`;
ws = new  WebSocket(wsUrl);
The library is responsible for processing incoming messages and executing callbacks for the main application to handle.
In order for the library to process the incoming messages, something like the following should be defined on the websocket:
ws.onmessage = (event) => {
   if (typeof event.data === 'string')
      MatterControllerLibrary.processLine(event.data);
};
The following would be a typical startup sequence on websocket open:
ws.onopen = () => {
    // Initialize with a websocket and a log handler
    MatterControllerLibrary.initControllerLibrary(ws, appendOutput);

    // Register for changes to attributes on all known nodes endpoints, and clusters
    MatterControllerLibrary.onAttributeChanged((nodeId, endpoint, cluster, attribute, value) => {...}

    // Register for change of status on any node
    MatterControllerLibrary.onNodeStatusCallback((nodeId, status, details) => {...}

    // Start the ball rolling. This brings known nodes online. Node Status messages will follow
    MatterControllerLibrary.initializeNodes()
    ...
When a status message of a node is reported as "connected" the main application would typically subscribe to all events and attribute changes from a node like so:
MatterControllerLibrary.nodeSubscribe(nodeId);
At this point, the application should be in control with full awareness of all known nodes, real-time updates to the nodes and with the ability to manipulate the nodes itself.
For example, to react to a change in Hue on an extended color light:
MatterControllerLibrary.onCurrentHueChanged(nodeId, endpoint, (value) => {
	console.log(`${nodeId}/${endpoint} Hue changed to ${value}`);
	...
	});
To read the state of an OnOff device, you'd do something like:
MatterControllerLibrary.readOnOff(nodeId, endpoint, (value) =>
   console.log(`The device state is ${value}`
 );
To command the OnOff device:
MatterControllerLibrary.controlOnOffDevice(nodeId, endpoint, "on");
To set the intensity level of a Dimmable Light to 50% :
MatterControllerLibrary.setLevel(nodeId, endpoint, 127);
To determine what kind of device(s) a node is, and what its capabilities are, basic information can be first found by calling MatterControllerLibrary.nodeLog and then calling MatterControllerLibrary.parseNodeLogData to parse the result into a minimal data structure. For now, the burden is on the application rather than the library to get more detailed information from the log data. For an example, see the nodeLogCollectionand processLogdata functions in the MatterInspector example. To see the extensive raw data that is returned from the nodeLog function, use the Query button in the MatterInspector example which makes the same call.
current limitations
- not handling events
- or color change other than hsv
- and more...